A default banner image is included with the Library’s WordPress theme.
To add a custom banner image that will appear on the homepage and all other pages, follow these steps:
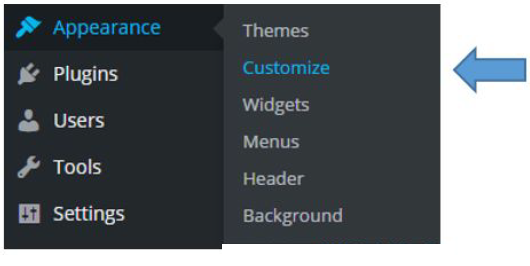
- Use the left hand menu in the WordPress Admin Dashboard and navigate to “Appearance” > “Customize.”
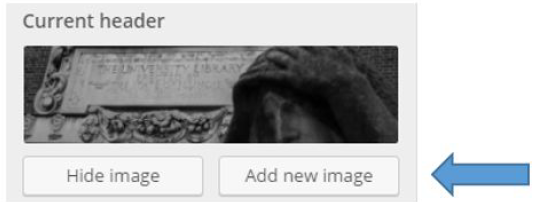
- In the left hand menu click on “Header Image.”

- Click on “Add new image”, then on the “Upload Files” tab and upload the desired image. For proper display the suggested size is at least 1170 x 200 pixels. The image width should be at least 1170 pixels and the height should be at least 200 pixels.
- Once the file has been selected, add the appropriate “Alt Text” in the right hand column. Click “Select and Crop” in the lower right hand corner.
- In the “Crop Image” section hover over the highlighted box that overlays the image and drag it to the area of the image that you want to display then click “Crop Image.”
- Click “Save & Publish” in the upper right hand corner.