By: Katie Hartman
Technically speaking, dutching simply refers to the process of hardening a quill by using heat. However, since the process of using a dutching tool differs greatly from the other methods discussed in part 1, it is useful to refer to the process of using a dutching tool as dutching and the process of hardening a quill via sand or microwave as curing. Dutching is an interesting way to temper a quill before cutting. Unlike the previous methods of curing, you have much more control with dutching because you can see the quill changing color as you heat it. For this method of hardening the quill, you will need a dutching tool and a clothes iron.
An iron is easy enough to get, if you don’t own one you could probably borrow one, and the dutching tool itself are fairly easy to make at home. This method has been adapted from Patricia Lovett’s Calligraphy, Illumination & Heraldry: A Historical and Practical Guide (British Library, 2000).
Making a Dutching Tool
Materials:
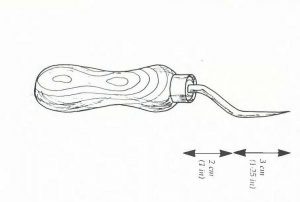
1 Brass cup hook (diameter of 2-3 cm or 1in)
1 Wooden handle (such as the ones used for a screwdriver, awl, etc.)
Hammer
Pliers
Metal File
Method:
- Straighten the hook: On a work surface, use the hammer and pliers to unbend the hook’s curve.
- File the metal: Once the hook has been flattened, take a file and file the metal so that the underside is flat and the end comes to a dull point.
- Attach the handle: Attach the metal part of the tool into the handle (I would recommend wood or some non-heat conducting material). Depending on the type of handle that you’re using, you may be able to screw the hook into the handle, but glue may be necessary as well. Make sure that you’re using glue that does not reactivate or react poorly to heat if you are going with this option.
The final product should look something like this:
(Image from The Historical Sourcebook for Scribes, by Patricia Lovett and Michelle P. Brown)
Now that you have a dutching tool, let’s talk about the actual process of using the dutching tool.
Using a Dutching Tool for Curing
Materials:
Prepared Quills
Dutching Tool
Clothes Iron
- Prepare the Quill: Prepare the quill using the steps described in part one. Remove the quills from the water, dry, and shake out any moisture remaining.
- Heat the Dutching Tool: Set the clothing iron to the setting for silk and wool (usually signified by one dot) and allow it to heat. Once the iron is heated, place the dutching tool against the iron’s hot plate and keep it there until the tool has become hot.
- Cure the Feather: With the dutching tool still pressed to the plate, take a feather in your other hand and press it to the iron’s hot plate. Slide the dutching tool into the open end of the barrel, using the tool to press the feather to the iron and rotate the quill. Keep rotating the quill at a steady pace to ensure even heating and to avoid blistering. If you keep the quill still too long, it may overheat and splinter.
- Watch for the Color Change: As you heat the quill you will begin to see the quill’s barrel change from an opaque white to a waxy, transparent yellow. Once this has occurred, you may remove the quill from the iron. Set the quill aside and repeat these steps with any other quills in the batch. The quill is now ready for cutting.
Bibliography
Brown and Lovett. The Historical Source Book for Scribes. Toronto-University of Toronto Press, 1999.
Lovett, Patricia. “Materials and Equipment .” The British Library Companion to Calligraphy Illumination & Heraldry: a History and Practical Guide. The British Library, 2000, pp. 13–34.