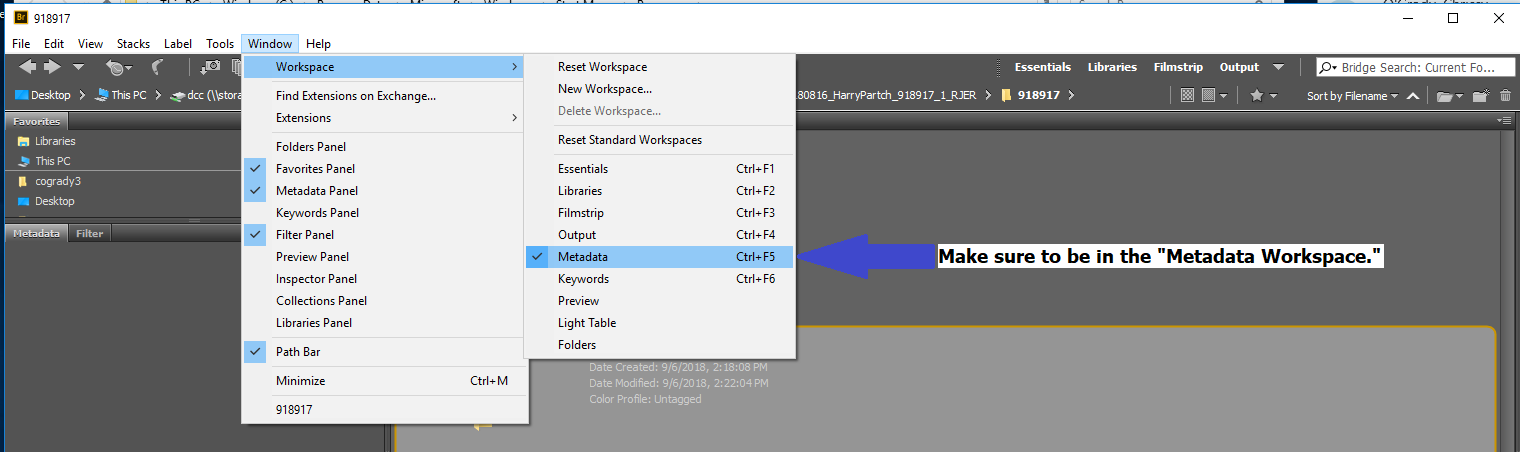
We use Adobe Bridge to check technical and descriptive metadata during self-quality control and during final Quality Assurance.
Checking and Changing Metadata Using Adobe Bridge:
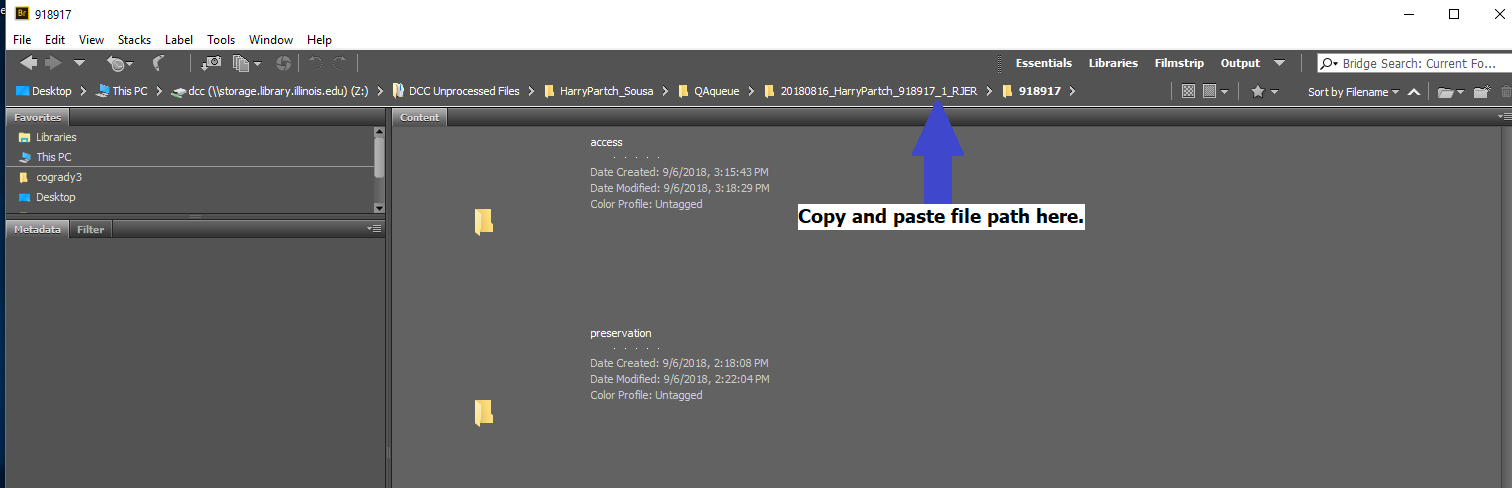
- Open Adobe Bridge and navigate to “Output” files you would like to check.
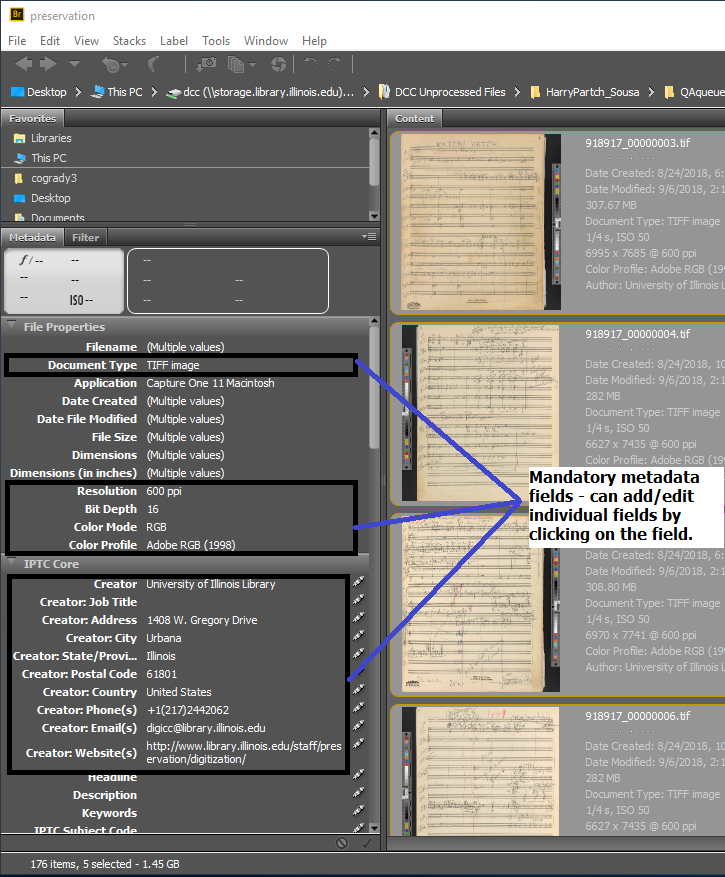
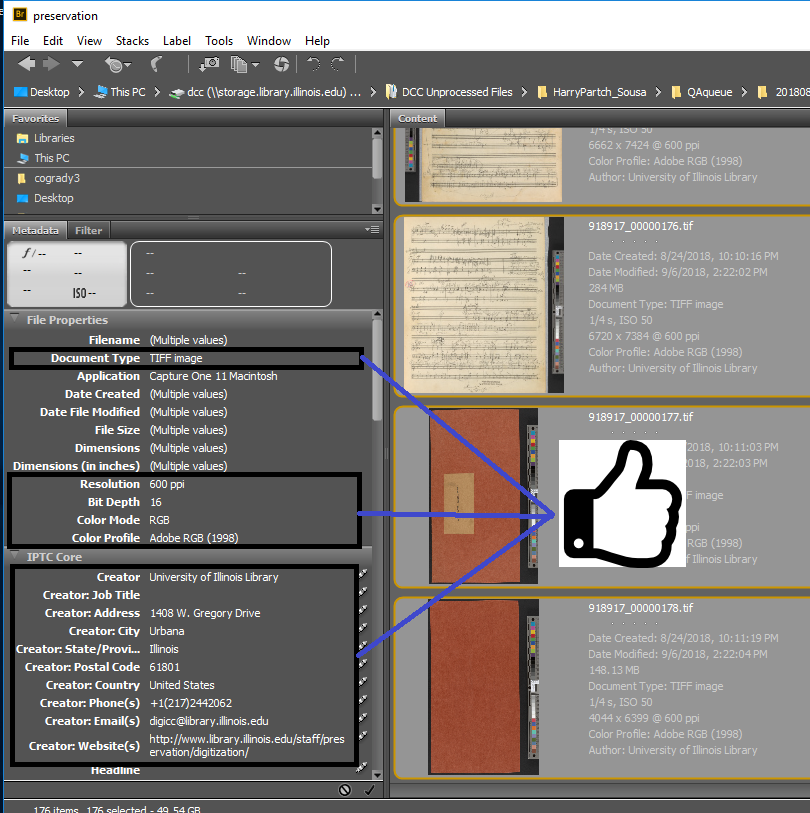
- Select a file or files to view the metadata on the left hand side. Check to make sure that the file or files have the correct mandatory technical and descriptive metadata. Watch out for mandatory entries with “multiple values.”
- Verify correct technical metadata for both preservation and access files
- Verify correct descriptive metadata
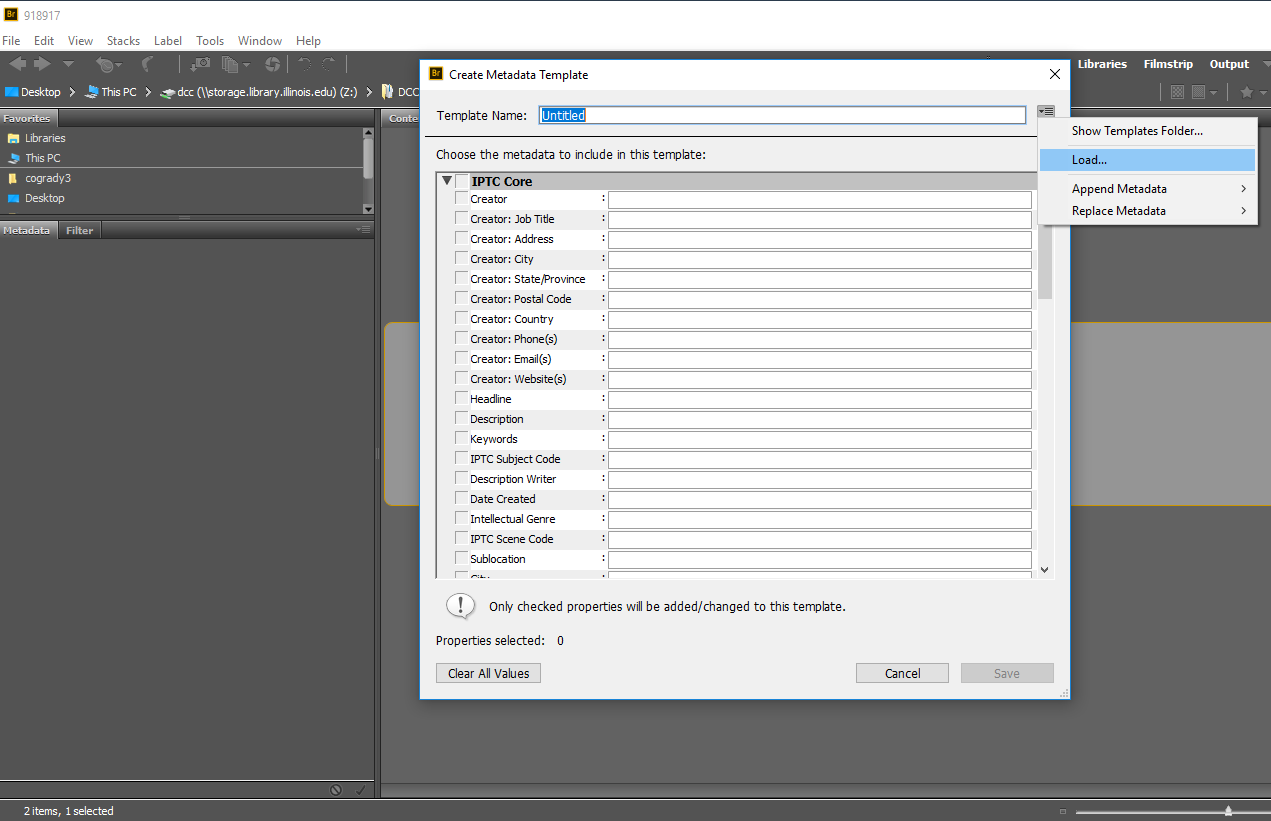
- IPTC Core
- Creator: University of Illinois Library
- Creator Address: 1408 W. Gregory Drive
- Creator City: Urbana
- Creator State: Illinois
- Creator Postal Code: 61801
- Creator Country: United States
- Creator Phone: +1(217)2442062
- Creator Email: digicc@library.illinois.edu
- Creator Website: http://www.library.illinois.edu/staff/preservation/digitization/
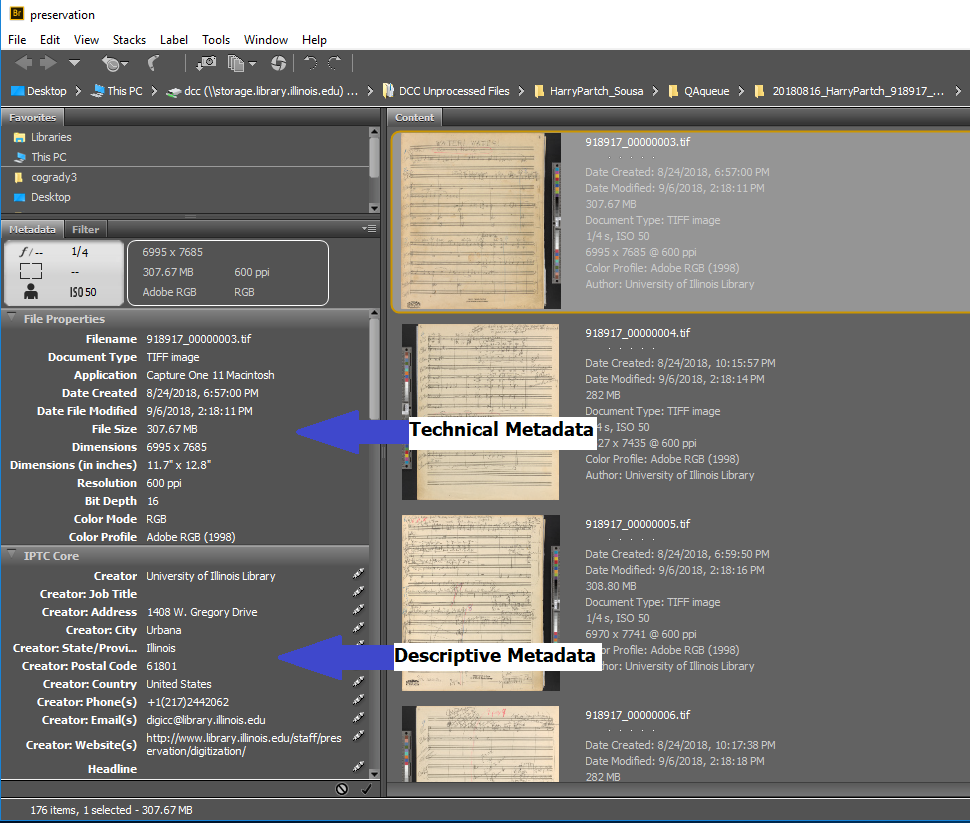
- IPTC Core
- Check that technical and descriptive metadata fields are all the same for all the files. Non-mandatory fields will have a “multiple values” entry and that is fine!
- The descriptive metadata can be changed in Bridge – it cannot change technical metadata. **Files will need to be outputted again from the original session using Capture One in order to fix technical metadata issues. Photoshop can be used for individual files.**
- Within the Metadata work space, click on the “stacks” to replace the metadata for the selected files.

- Please note – You can set standardized metadata profiles by selecting the “Create Metadata Template” option within the “stacks” drop down menu.

- Within the Metadata work space, click on the “stacks” to replace the metadata for the selected files.
- Double check that the metadata applied by selecting the file or files and checking the metadata on the left hand side!
Please find the official Adobe Bridge User Guide.