We use Abbyy FineReader to create OCR PDFs from image files. Abbyy Hot Folder is included in Abbyy FineReader and is used to schedule “tasks” for PDF creation.
- For more information about Abbyy FineReader: http://help.abbyy.com/en-us/finereader/12/overview
- For more information about Abbyy Hot Folder: http://help.abbyy.com/en-us/finereader/12/hotfolder
Scheduling OCR PDFs creation for typed text:
- You can either open Abbyy Hot Folder by going through Abbyy FineReader or by searching for Abbyy Hot Folder on its own.
- Once you have Abbyy Hot Folder open, you will see any previous tasks and can create a completely new task by selecting the “New” button in the top left corner.

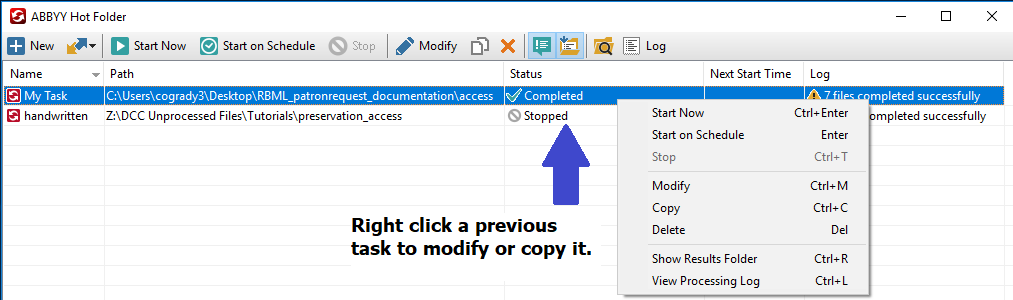
- You can copy or modify a previous task in the queue by right clicking it.
- You can import an already made task recipe and modify it.

- You can copy or modify a previous task in the queue by right clicking it.
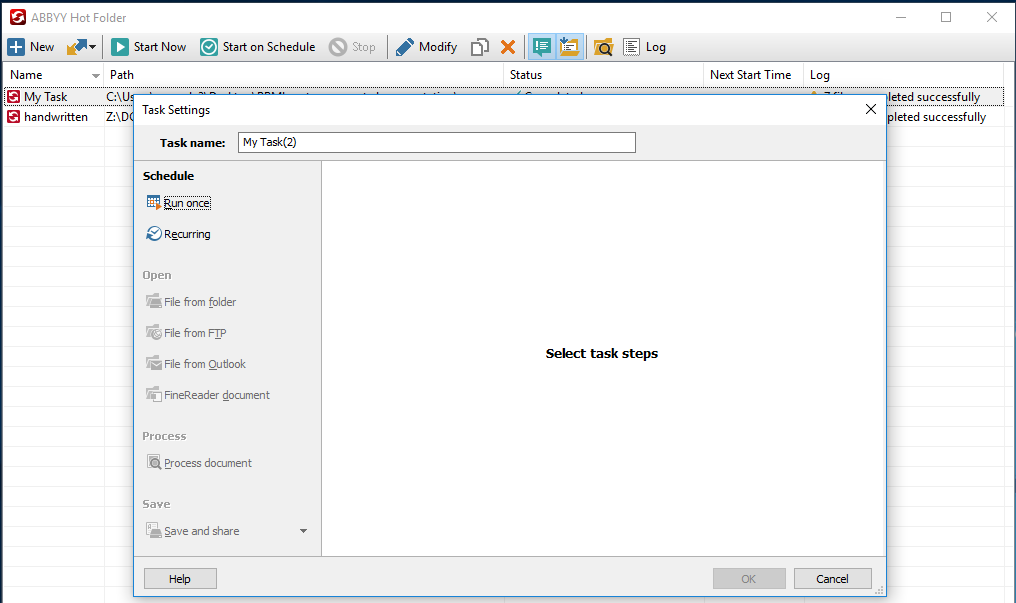
- When you create a new task or modify a previous task, a “Task Setting” window will pop up.
- If you modify an existing task or import a task recipe, the “Task Setting” window will have information already inputted, but make sure that it is correct before scheduling!
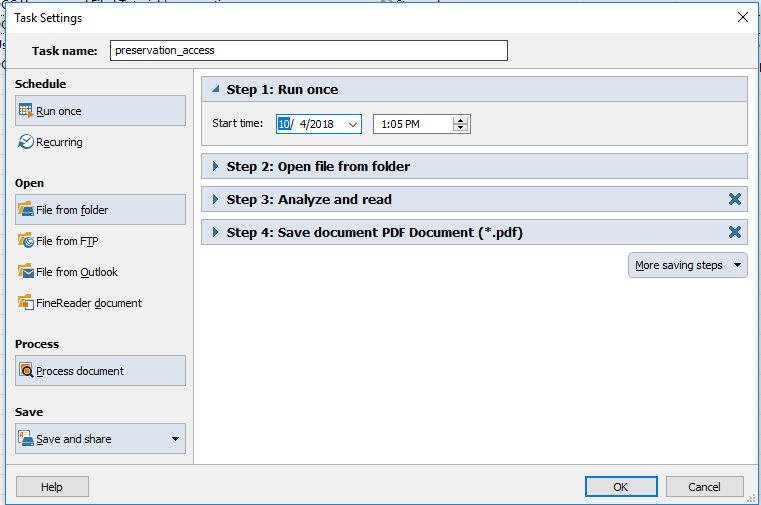
- You can “Schedule” a new task on the left hand side to “run once” or “recurring.” Normally we select the “Run once.”
- Put in the start date and time. If you are scheduling more than one task, remember to stagger them so that they run at different times. (We have found that the software works quicker when you do this).
- You can also rename the task to reflect the item or library you are creating the PDF for.
- If you modify an existing task or import a task recipe, the “Task Setting” window will have information already inputted, but make sure that it is correct before scheduling!
- Once you’ve scheduled, you can move to the “open” tab on the left hand side. Select the “File from folder” option and use the “browse” to locate the folder or folders with the files you would like combined into an OCR PDF.
- Make sure to “Keep in the original folder.”
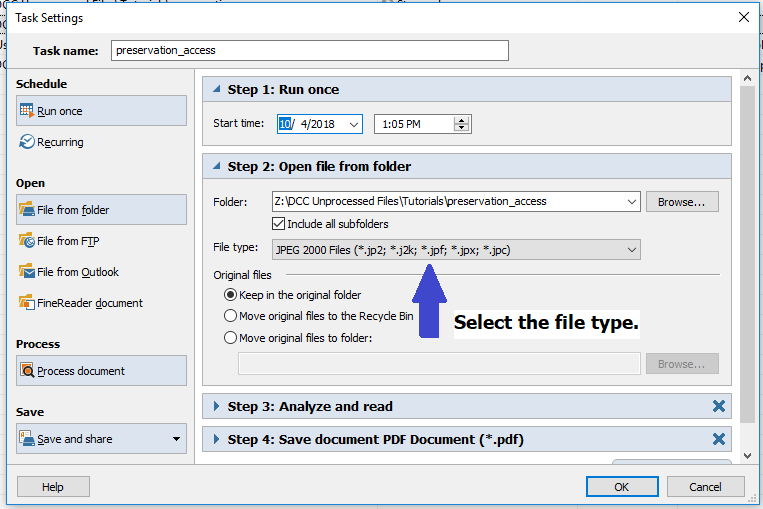
- Make sure to “Keep in the original folder.”
-
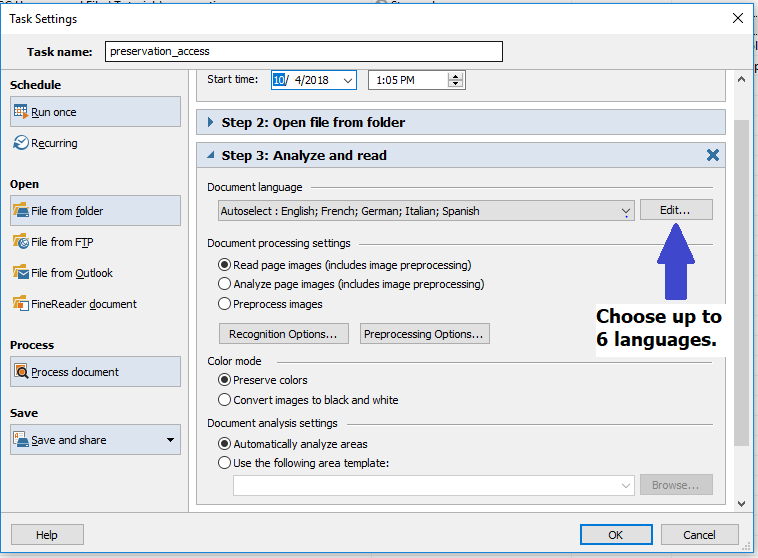
- Move to “Process document” under the “Process” tab on the left hand side.
- Analyze and read
- Document Language: select “Edit” and choose up to 6 languages depending on the item
- Document processing settings: “Read page images”
- Color mode: “preserve colors”
- Document analyze areas: “automatically analyze areas”
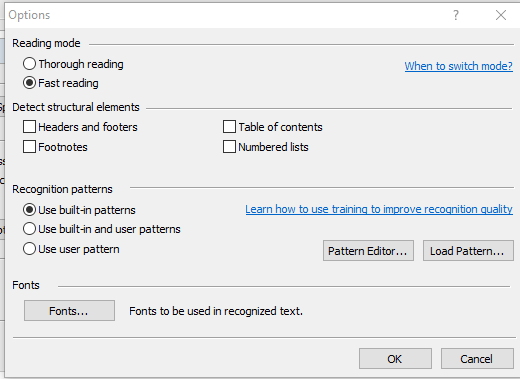
- “Recognition Options…” should look like this for typed text:

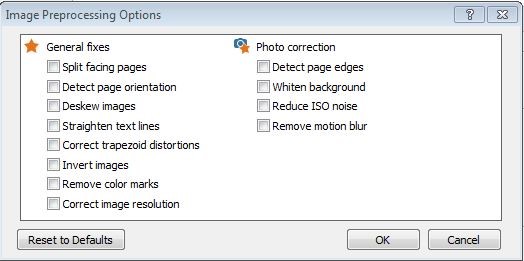
- “Preprocessing Options…” should look like this: UNCLICK all
- Analyze and read
- Move to “Process document” under the “Process” tab on the left hand side.
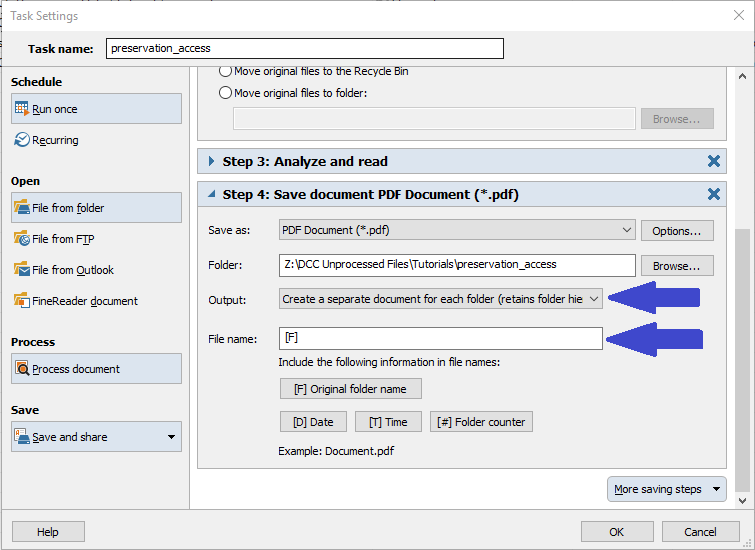
- Next click on the “Save and Share” option in the “Save” tab on the left. This is where you will select the task to save as “PDF Document”, browse for the folder you would like the PDF to save to, and insert file name.
- Make sure to select “Create a separate document for each folder” in the “Output” drop down menu if you are processing multiple unique IDs/BibIDs at once.
- Make sure that the file name remains original naming by using “[F].”
- The “Options..” next to the “Save as” section should look like this:
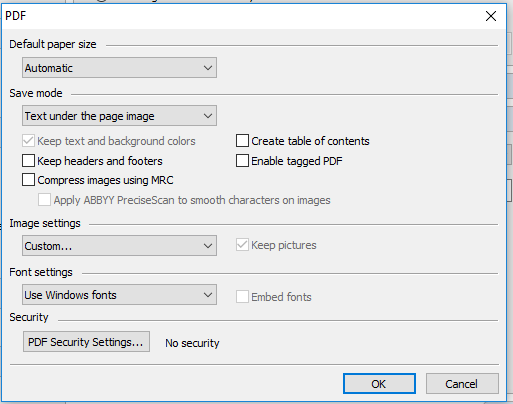
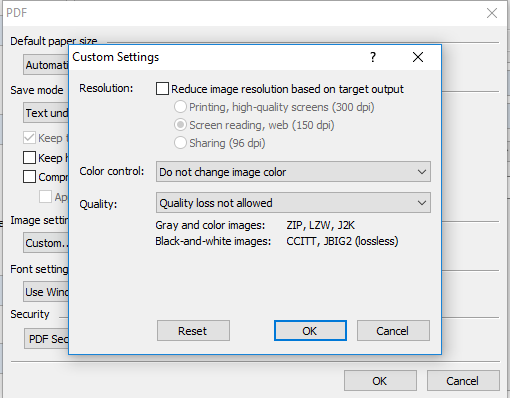
- Select the “Custom…” drop down menu in the “Image Settings” and make sure that the custom settings look like this:
- Make sure that the file name remains original naming by using “[F].”
- Make sure to select “Create a separate document for each folder” in the “Output” drop down menu if you are processing multiple unique IDs/BibIDs at once.
Scheduling OCR PDFs creation for written text:
- The only real change for written text is changing the “Recognition options…” in the “Process” tab on the left hand side. The “Recognition options…” should have the reading mode changed and look like this: