RightFax is a web-based fax service provided by Technology Services. Currently all library RightFax accounts are group accounts that have shared usernames and passwords.
RightFax Web Client
You can send or receive a fax using the RightFax Web Interface.
- First, log in with your unit’s shared username (in the form of “uofi\shared_username“) and password.
- Once authenticated, you’ll be directed to the RightFax Login page, all you need to do is to click the “login” button (do NOT type in anything, leave the setting as it is).
- To send a fax, click the “New Fax” icon in the menu bar.
- In the “To” section, type in the person to whom you’re sending the fax, select whether you’re sending this to a fax number or an email address, then type the fax number or email address in the “Destination” field.
- Scroll down to “Cover Sheet Notes” section, type in a cover sheet note if desired
- Under “Attachments”, click “Attach File”, on the next page, click “Browse” and navigate to the document that you want to fax, please make sure that it’s in one of the acceptable formats, then click the “Upload” button.
- You’ll get “The file upload was successful” message, click “Send” button if you’re ready to send the fax, otherwise, scroll down to attach a note or more documents.
- To check the status of your fax, go back to the homepage, click “Main” folder, if the fax was sent successfully, you’ll see “OK” under “Status”.
Please see RightFax user’s Guide for more information.
Receiving Faxes via Email
You can receive faxes via email. Notifications are also sent to the RightFax email box.
Webmail
Log into Webmail using the shared username and password.
- For incoming faxes (received), you’ll see two email messages:
- One for the arrival of a new fax
- The other has a copy of the fax (PDF attachment)
- For outgoing fax (sent), you’ll only get a confirmation message that the fax has been sent successfully.
Outlook
You can add the RightFax email account to your Outlook:
- In Outlook, go to the “File” tab (top left corner, in blue), click “Add Account” button (under “Account Information”)
- In the pop-up window, type your_RightFax_account@mx.uillinois.edu in the “Email Address” field, click “Next” and then “Finish”.
Restart Outlook, you will be prompted for logging in, sign in with the shared username and password
- You may get another login prompt, please check it against the image below, are the email addresses (underlined in red) the same?
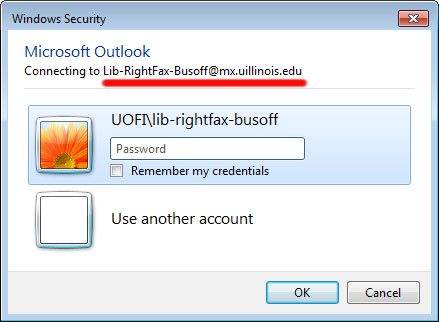
- If the login prompt has your own email address (your_netid@illinois.edu) or your departmental account (your_unit@library.illinois.edu), sign in with your NetID and AD password (what you use to log into your computer)
After Outlook has successfully restarted, you’ll see that the RightFax account has been added to Outlook (in left navigation pane). Please contact the Library IT Help Desk if you have any question.