Create Standalone Installer for Windows
Speedwagon can be made into a standalone application where the client requires no previous installation of Python or any other dependent software already installed. This technique bundles an embedded version of the Python interpreter along with all required 3rd-party packages to run Speedwagon. These files are conveniently wrapped up into a single archive package that can be executed by Windows and installed on the client machine by following the standard installation wizard.
Important
This currently requires you to have access to the UIUC devpi server to acquire Python Package dependencies created in-house.
In addition, pip must be configured so that the index-url is set to the following url: https://devpi.library.illinois.edu/production/release
There might be a workaround if the CMake variable for caching Python wheels is set to a directory where all the dependencies have been prebuilt as whl files. However, this idea has not been tested or explored.
Requirements
To generate an installation wizard you need the following tool installed.
One of the following:
For MSI installers:
For .exe based installers
Instructions
Create a new folder somewhere on your computer to use as your build directory.
Use either CMake CLI or GUI to generate a configuration.
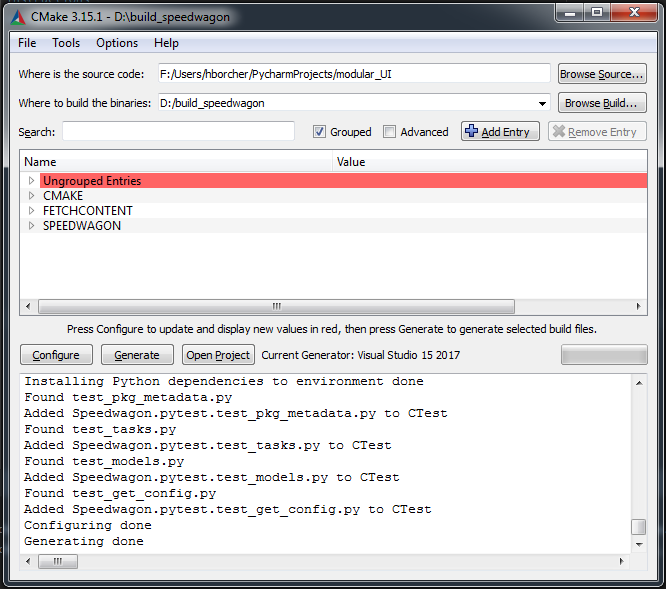
Note
This might take some time because this step generates a local Python development environment. It has to download and install all the required build and runtime dependencies.
Open a Command Prompt in the build directory.
Build the Python Project with the following command:
cmake --build . --config Release
Note
If you choose a different build generator other than a Visual Studio type, you might need to remove the “–config Release” part of the command. Some generator types automatically generate only a release build by default during a build, whereas Visual Studio generators allow for a “multi-build configuration”. For this reason, when using Visual Studio for the build generator with CMake, it’s required to indicate which type of build is being created in the command line arguments during build-time.
Use CPack to generate the requested installer type
For create an MSI installer:
cpack -G WIX --Config ReleaseFor an NSIS style installer:
cpack -G NSIS --Config ReleaseNote
Only WIX and NSIS have been tested. However, for a list of installer generators supported by CPack, check out the cpack documentation and the cpack-generators documentation
