Both of the latest models that we’ve been purchasing, the HP Color LaserJet 4700 and the HP LaserJet 4015, have this capability and the process is nearly identical for the two models though these steps may need minor modification for other printer brands or models.
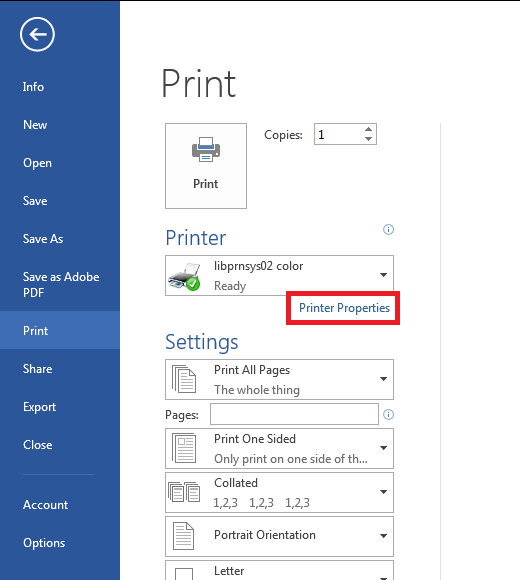
Go to File, Print like you would for any normal print job and click the Printer Properties button.
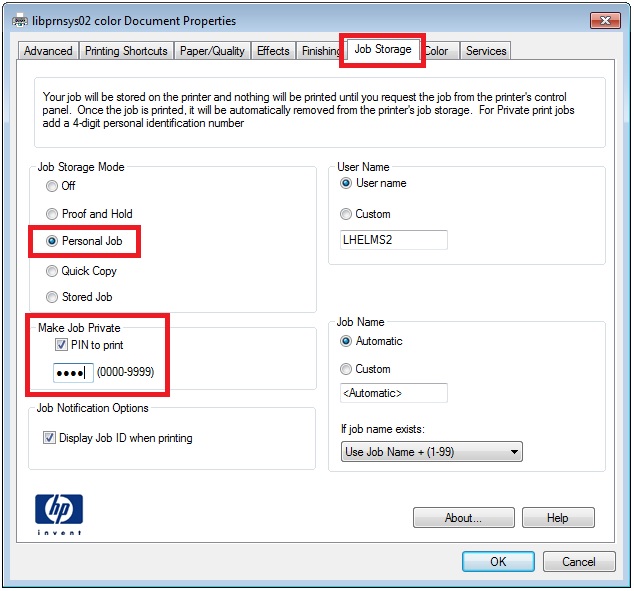
This will pull up the document properties window. Switch to the Job Storage tab and select that this is a Personal Job. Then check the box, PIN to print and enter a four digit PIN. You can also customize the User Name if you’d like to make your job more recognizable.
Click Ok on the Document Properties window to keep these settings and then click Ok on the Print dialog to send the job off to the printer.
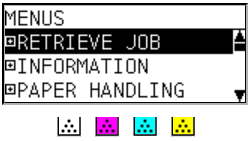
The printer might make a noise like it’s starting a job but it should whine down after a second or two. Walk up to the printer and use the buttons on the front of the printer to perform the next few steps. Click the Menu button to bring up the Menu. With Retrieve Job highlighted, click the Checkmark button.
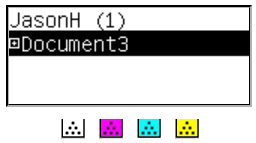
The display on the printer will update to show users who have stored jobs on the printer. Select the username you chose and click the Checkbox button.
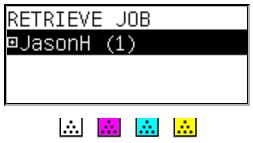
Now under your user name, the printer’s display will show what jobs you have stored at the printer. Select the job you want and click the Checkbox button one more time.
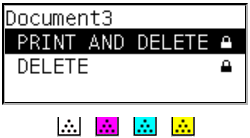
You’re now given the option to ‘Print and Delete’ or ‘Delete’ the job. With ‘Print and Delete’ selected, click the Checkmark button again.
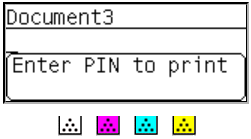
This will prompt you to enter the PIN you chose. Using the up&down arrows on the printer (or a Number pad, if your printer has one) enter your PIN and click the checkmark to submit it.
Your job should now be printing for your eyes only.
For another Green IT tip, the Proof and Hold option in the Document properties window is good choice even if you’re not needing to print confidential documents. It will print one copy of the print job and then wait for you to release it. This will save paper and trees by not printing multiple copies of an incorrect document and, hey, why not print duplex while you’re at it?